 1992
1992


Making Lynx longer
by Johan Kjellander 2014
After eight years with Lynx she was more or less completed inside. Martin was 3 years old and Gustav on his way. We were planning to sail south but before that there was one more thing we wanted to do. We wanted to add an extension to the stern that would act as a storage place for our dinghy.
Many owners of Guyline boats added such extensions, (you could bye them from Finland) but they were open and not very well suited for a dinghy like ours. We wanted an extension with a deck, so we started thinking about doing something ourselves.
As you see on the picture above, the stern on the Guyline is relatively wide and if you follow the lines of the hull backward, it's quite obvious that extending the lines somewhat is possible. It does look like she is a little cut off, doesn't it ? Many modern boats are made that way to increase space inside.
So, how do you make an extension that will be long enough to carry your dinghy and still look nice? First step was to create a CAD-model of the original hull. I did that by measuring positions every meter along the deck line, water line and bottom line of Lynx. These curves are the most important curves in the shape of a hull. With the curves in the computer it was relatively easy to see what they would look like if you extended them more or less. I found that an extension of 1.85 meters was an acceptable compromise between our need for space and aesthetics. The more you extend the lines the closer together they come and too much of this tends to look awful.
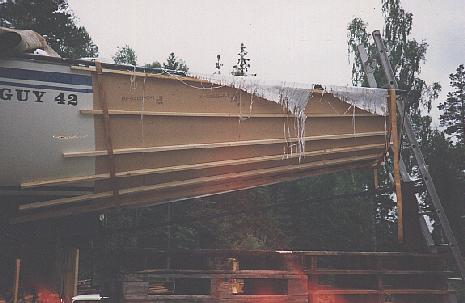
Now it was time to do the same thing in real life. From the computer I extracted the shape of the hull in a section at 1.85 extension. I used this to cut out the temporary stern you see in the right picture above. With a lot of measuring and steel tubes and welding, I got the temporary stern into its right position relative to the hull. This was the tricky part, the rest was relatively easy. The idea was to create a mould and laminate the outer shell of the extension in place so that it would connect to the hull without any visible misfit. I used two white painted Masonite boards, one on each side of the extension as mould and reinforced them with wood strips that I pressed close to the old hull and the temporary stern with strong straps. See the left picture above.
With the mould in the right position I painted it inside with two layers of gelcoat and then added glass fibre rowing and polyester. Next day I removed the mould and the new hull became visible, right picture above.
It was now time to continue the work in my workshop. The thin glass fibre shell was removed from the boat and taken inside. See left picture above. I now added a deck (mid picture) and a stern (right picture above). The square opening in the deck was covered by a skylight. I worked most of the winter to complete the extension. To make it stronger I added balsa core inside and a few more layers of glass fibre.
When the weather got warm enough I took the extension outside again and bolted it in position with 20 M8 screws through the old stern. Then some fairing with filler and finally painting with a colour that was as close to the old hull as possible.
This is what she looked like with the new extension. Longer, faster, more exiting in my opinion...We sailed for 6 more years with this extension and during that time we got compliments from many people who said they thought she was beautiful.
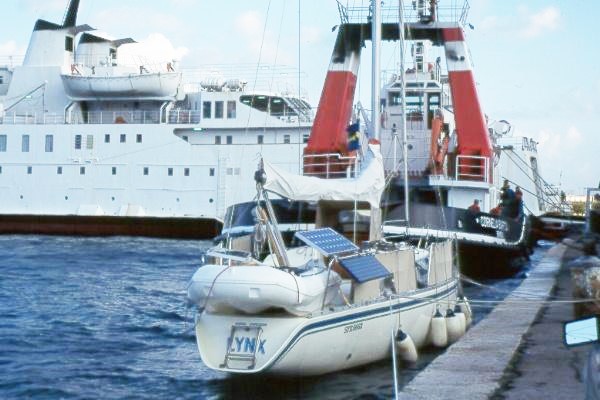
More important than the looks however, was the new space for the dinghy. Launching the dinghy was easy, just kick her backwards over the stern. Taking her up was a little tougher, but I managed it myself without help. The new pushpit also offered a new possibility for more solar panels. On the picture above from Italy 1996 you see the dinghy in position and 3 solar panels of 50 watts each.


